


By the time I stepped off the Kepler Track at Rainbow Reach, I had circled 60 kilometers of Fiordland forest, limestone bluffs, tussock tops and lakeshore, and also learned exactly where this Great Walk is generous and where it hurts. I hiked the full loop in three days in mid-March, staying in all three Department of Conservation (DOC) huts and starting and finishing in Te Anau. What follows is a chronological account of those days, with the practical decisions pulled forward so you can plan your own Kepler with clearer expectations than I had when I clipped my pack on at the lakeside car park.
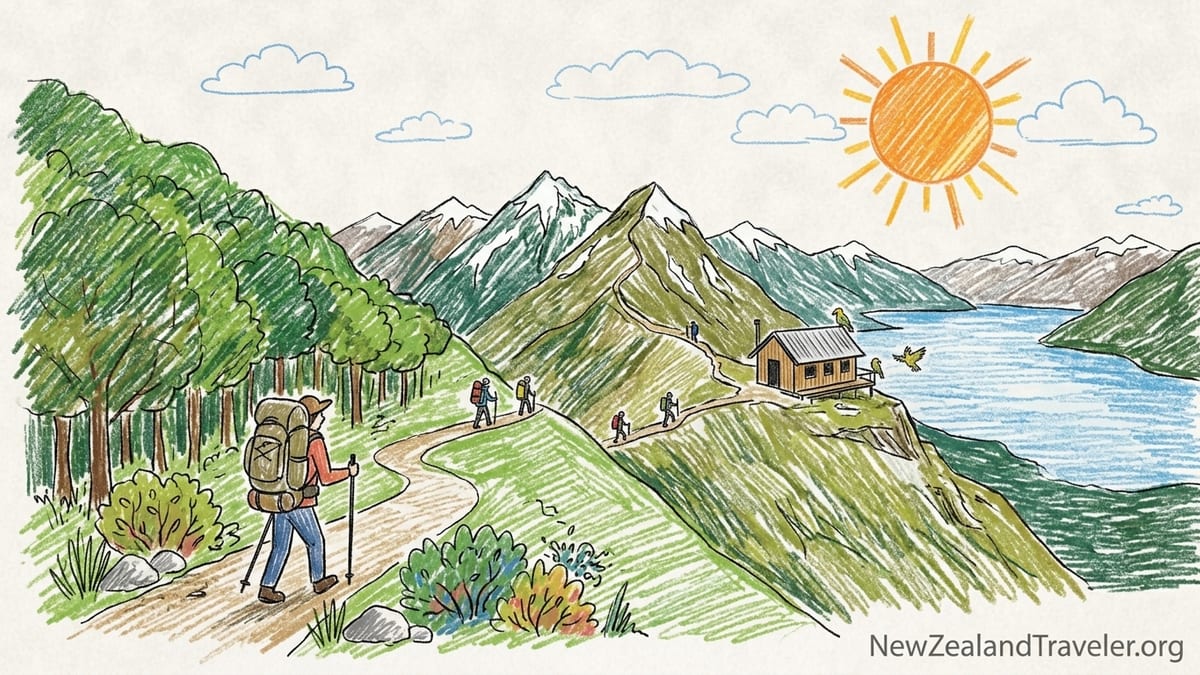
Planning the Kepler: Season, Bookings and a Realistic Itinerary
I walked the Kepler Track near the tail end of the Great Walk season, which for 2026/27 runs from 27 October 2026 to 30 April 2027. In that window, hut and campsite bookings are compulsory, hut wardens are present, gas cookers are provided in the huts, and the track sees regular maintenance. I booked my three nights directly through DOC’s online system several months ahead, but on this track in particular I met several people who had picked up cancelled nights only weeks out. The loop is popular yet not as brutally competitive as the Milford, so if your dates are flexible it is worth checking back for new spots that appear as people change plans.
I chose the classic three-day hut itinerary: Kepler car park to Luxmore Hut on day one, over the alpine section to Iris Burn Hut on day two, and out past Moturau Hut to Rainbow Reach on day three, catching a pre-arranged shuttle back to Te Anau. Many people stretch this to four days by staying at Moturau instead of walking past it, and I will explain later why I would probably do that next time. DOC suggests about 5–6 hours to Luxmore, 6–7 hours to Iris Burn, and 5–6 hours out to Rainbow Reach. My actual moving times, walking at a steady but not athletic pace with a full multi-day pack, were closer to 4 hours 20 minutes, 6 hours 15 minutes, and 5 hours flat respectively, with about an extra hour of breaks and photo stops each day.
Weather dictated my direction. The alpine tops between Luxmore Hut and Forest Burn Saddle are the exposed highlight of the route, and Fiordland is notorious for multi-day storms. I watched the MetService and local DOC forecasts for several days and timed my departure so that day two, my ridge day, lined up with a clear spell. This meant starting midweek rather than over a weekend and being willing to shift my Te Anau accommodation by a day. It was worth every bit of rebooking hassle when I stepped out above the bushline into still air and long views instead of walking inside a grey cloud.
For a pack system, I committed to hut-only, no camping. That meant I could leave the tent at my Te Anau motel and keep my base weight reasonable. With a 50-liter pack, three days of food, rain gear, a small first aid kit, and extra layers, my total pack weight leaving the Kepler car park was about 12 kilograms including 2 liters of water and a DSLR camera. It was still heavy enough to feel every staircase, but light enough that my knees survived the long downhills.
Day One: Lake Te Anau to Luxmore Hut and the Long Climb Through Forest
I started at the Kepler Track car park a few minutes’ drive from Te Anau just after 9 a.m., having pre-booked a local shuttle instead of leaving a rental car for three days. The first hour along Lake Te Anau is disarmingly gentle. The track wanders through mossy beech forest beside the lake, wide and well-graded, with families and day walkers heading to Brod Bay. My pack felt comfortable, the weather was calm, and the whole thing seemed almost too easy. This is the flattest walking of the entire loop and offers an understated introduction before the climb truly begins.
After about 1 hour 15 minutes I reached Brod Bay, where some hikers had taken the morning water taxi from Te Anau and were adjusting their packs. This shortcut trims roughly 1 hour 15 minutes off day one and is worth considering if you are short on time or nervous about the full climb. I took a quick snack break, topped up my water from the tap at the campsite, and started up the main ascent to Luxmore Hut. From this point the trail begins rising in long zigzags through mature forest, gaining about 800 vertical meters to the bushline.
The climb is steady rather than technical, but with a 12-kilogram pack it was where I first really felt the Kepler. I settled into an unhurried rhythm, pausing briefly every 30–40 minutes. It took me 2 hours 40 minutes from Brod Bay to reach the bushline clearing, almost exactly matching what I had seen in several trip reports. The DOC signs list longer times, but unless you are very undertrained you will probably beat them by 30 to 60 minutes on this section. The reward for the grind is the moment the trees fall away and the first views open over Lake Te Anau and the Murchison Mountains.
From the bushline it was another 40–45 minutes of much more open walking along a benched track through tussock to Luxmore Hut, perched at about 1085 meters. Low cloud lifted as I walked that last traverse and I arrived at the hut around 2 p.m., 4 hours 20 minutes of actual walking from the Kepler car park plus about 40 minutes of breaks. I checked in with the warden, claimed an upper bunk near the window, and walked the extra 15 minutes uphill to the Luxmore summit side track junction for a look at the ridge I would cross the next morning. The wind was cool but not aggressive and visibility was good out to Lake Te Anau and distant ridges, which boosted my confidence about the next day’s forecast.
Hut Life and Night One: Luxmore’s Views vs High-Altitude Rest
Luxmore Hut is the most dramatic of the three Kepler huts and also the least restful. It is a large, two-wing structure set on an open slope with big views but very little shelter. Inside, the hut has bunks with mattresses, gas cookers provided by DOC, stainless steel benches, long tables, and flush toilets during the Great Walk season. Water comes from rain tanks, and when I visited the warden made a short briefing about water conservation and using the toilets properly. The hut can feel busy, but it is also one of those rare mountain places where you can cook dinner while looking straight out at a wall of Fiordland peaks instead of dense bush.
I quickly realized what I had overpacked. I carried a full 1-kilogram DSLR camera body and lens, a second fleece that I never wore, and a small paperback novel I opened only once. Together they probably added 1.5 to 2 kilograms that I repeatedly wished away on day two’s descents. If I were to repeat the track I would carry a smaller mirrorless camera or rely on a modern phone, bring one warm midlayer instead of two, and leave the book in Te Anau in favor of simply talking with other walkers. In the hut, conversation is its own entertainment.
Sleep quality at Luxmore was compromised less by snoring and more by the hut’s exposure. As night fell, the wind picked up along the ridge and the hut creaked and rattled. Temperatures dropped below freezing outside, and even with a good three-season sleeping bag I woke up twice to add a hat and socks. Earplugs helped with the wind noise, but if you sleep lightly, Luxmore may feel rougher than the lower huts. The upside is waking early to a pink band of light over the lake and watching cloud spill over distant saddles while you eat porridge.
In terms of food and water, I carried three simple hot dinners (two freeze-dried meals and one couscous mix), oats and dried fruit for breakfast, and wraps with cheese and salami for lunch, plus a stash of nuts and chocolate. At Great Walk huts like Luxmore, DOC provides gas cookers, so you can leave your own stove at home and just bring a pot or lightweight billy. For water, I carried 2 liters out of Te Anau and refilled at each hut, drinking about 3 liters a day in total. On this track, water access is frequent and reliable during the season, so there is no need to haul very large volumes between huts unless you simply prefer to.
Day Two: Luxmore to Iris Burn and the Exposed Alpine Ridge
Day two was the centerpiece: Luxmore Hut to Iris Burn Hut over the alpine section. I left just before 8 a.m. into clear skies and light wind, having watched several groups set off earlier to spread out on the ridge. The track climbs in a series of gentle traverses and shallow zigzags from Luxmore Hut to the Luxmore summit turnoff, which I reached in about 40 minutes. I dropped my pack behind a rock and walked the extra 10–15 minutes to the summit itself, rewarded with 360-degree views over Lake Te Anau, the Takitimu Mountains, and the Iris Burn valley. In poor visibility this detour would be more a tick-box than a pleasure, but in clear weather it felt like the most expansive viewpoint of the whole circuit.
Back on the main track, the path follows a series of broad ridges and saddles, much of it on benched gravel with frequent snow pole markers. I reached Forest Burn Saddle and the small shelter there in about 1 hour 45 minutes from Luxmore Hut, including the summit side trip. This stretch is fully exposed in almost every direction. On my day it was a rare calm, with light wind and visibility across layer after layer of blue-grey hills. Several people I met later described doing the same section in clag so thick they could barely see the next marker, in wind strong enough to knock them sideways. It is easy to understand why DOC and experienced trampers advise timing your Kepler start to give yourself the highest chance of at least one clear ridge day.
Between Forest Burn and Hanging Valley shelters, the track dips and rises along a narrow ridge, with steep drop-offs on both sides in places. The surface is broad and secure, but if you are uncomfortable with exposure it may tighten your chest a little. I took an early lunch at Hanging Valley Shelter, reaching it about 3 hours 15 minutes after leaving Luxmore, then began the enormous descent into the Iris Burn valley. Here the character of the Kepler changes again. You leave the tussock tops, drop through stunted subalpine scrub and then re-enter tall, dripping forest. Underfoot, the engineered gravel track gives way to longer stretches of roots and mud, and the descent works first on your thighs and then your knees.
The downhill from the ridge to Iris Burn Hut was the physically hardest section of the entire loop for me. From Hanging Valley, it took another 2 hours 45 minutes of mostly descending to reach the hut, for a total of around 6 hours 15 minutes of walking including the summit side trip and breaks. With a full pack, each step down felt like a small squat, and by the time I reached the flats my quadriceps were shaking. This is where my overpacking was most obvious and where good trekking poles proved their worth, taking some impact off my joints. Even in dry conditions, this descent is long; after heavy rain it would be slow and demanding.
Iris Burn: Forest Basin, Sandflies and a Better Night’s Sleep
Iris Burn Hut sits on a grassy clearing in a wide valley, flanked by steep bush-covered slopes and a river that curves just beyond the hut lawn. Compared with Luxmore it felt sheltered, green and surprisingly quiet even with a full complement of walkers. The hut layout is similar, with bunk rooms around a central kitchen and dining area with gas cookers. The surrounding campsite spreads through the trees nearby. In the late afternoon, people wandered to the nearby waterfall, about 20–30 minutes up a side track, or stretched sore legs on the lawns.
Sandflies are the defining nuisance at Iris Burn. On arrival, I sat on the grass to take off my boots and was instantly surrounded by a black halo of biting insects. Everyone quickly adopted the same strategy: long sleeves, long trousers, socks, and a head net or liberal repellent. The moment you stop moving near dusk, you want some sort of barrier between you and the air. Inside the hut they were much less of a problem, though a few inevitably sneaked in as people opened doors. Compared with Moturau the next day, Iris Burn’s sandflies felt more intense, likely because of the swampy ground and slower-flowing water around the valley floor.
Despite the bites, I slept far better here than at Luxmore. The valley location muffled the wind, temperatures were milder, and the bunkrooms felt more insulated. I took a lower bunk to avoid drafts from the windows and used my jacket as an extra pillow. Many walkers compared notes about timing the ridge for clear weather, and one group who had traversed in heavy mist the previous day admitted that they had seen almost nothing of the famous views. Their experience reinforced my sense that if a poor forecast lined up precisely with your planned ridge day, it might be worth swapping your direction or even postponing the walk instead of spending hours inside a cloud.
Food-wise, this was the night I was most grateful for simple, high-calorie meals. I finished a full freeze-dried curry and then went back into my snack bag, while several others regretted having packed lighter options. The day’s 900-meter descent plus rolling ridge climbs burn more energy than you might expect. If you are undecided between a 600-calorie dinner and an 800-calorie one, bring the larger and leave something heavier and less useful behind. There is nowhere to buy extra food on the circuit and no waste disposal at the huts, so you must also carry out any packaging.
Day Three: Iris Burn to Moturau and Rainbow Reach, Forest, Wetlands and Lake Manapouri
My final day ran from Iris Burn past Moturau Hut to Rainbow Reach bridge, combining DOC’s usual day three and four into one longer walk. I left just after 7:30 a.m. into cool, shaded forest, legs a little stiff from the long descent the previous day. The first few kilometers follow the river on a gentle downhill gradient, then flatten. The forest here feels richer than the beech around Lake Te Anau: more ferns, more undergrowth, more of the deep greens and filtered light that many people picture when they think of Fiordland. The track surface returns to the Great Walk standard of wide benched gravel in many sections, and it felt noticeably kinder on my feet.
It took me around 3 hours 10 minutes to reach Moturau Hut at the edge of Lake Manapouri, including one 15-minute snack stop along the way. Moturau sits right on a sheltered beach, with views across the water and a short track down to the lake. Several walkers who had stayed there the previous night declared it their favorite hut on the circuit, precisely because of this lakeside setting and the chance for a cold swim at the end of a hot day. Arriving mid-morning, I brewed a quick coffee on the hut stove, walked barefoot along the beach, and seriously questioned my decision not to break the day here.
From Moturau to Rainbow Reach, the Kepler changes again. The track crosses boardwalk sections through wetlands and then returns to river terrace forest as it follows the Waiau River. This last section is less dramatic than the alpine tops but has its own quiet appeal, especially as you begin to hear the river more often through the trees. It is also where cumulative fatigue shows. Even though the track is mostly flat or gently rolling, my feet and shoulders felt each kilometer more than they had on day one. I met several people who had chosen to stop at Moturau and walk out the following morning, and watching them drop their packs for an early swim I finally understood why.
From Moturau to Rainbow Reach bridge took me just under 2 hours, for a total of about 5 hours walking from Iris Burn plus roughly 45 minutes of breaks. The final swing bridge over the river marks an understated finish. There is a small car park where I met my pre-booked shuttle back to Te Anau, along with a few day walkers who had taken the bus out and were walking a short out-and-back. If you are using a shuttle, confirm your pick-up time before you start the track and consider texting the operator from Moturau or an earlier point if you have coverage to update them on your likely arrival; Fiordland reception is patchy, but a brief signal saved one group I met from an anxious extra wait.
What I Would Change: Pack Weight, Pace, and Hut Choices
Overpacking was my single biggest mistake. That extra 1.5 to 2 kilograms of camera gear and unused clothing turned day two’s descent into an unnecessary suffer-fest. On a hut-based Great Walk like the Kepler, you can strip your kit to the essentials: a 40 to 50-liter pack, one reliable rain jacket, a light insulated jacket, one warm midlayer, two sets of socks, hut clothes, basic toiletries, a compact first aid kit, and simple food. With DOC gas cookers in huts in season, you do not need a stove, fuel, or heavy cookware. I met one experienced local tramper whose pack for the same three-day itinerary weighed around 8.5 kilograms including water, and the ease with which he moved over the ridge was obvious.
In terms of pacing, combining Iris Burn to Rainbow Reach into one day is absolutely achievable for someone of moderate fitness, but it does compress what could be a more relaxed lakeside afternoon into a march. Walking it in three days gave me a strong sense of accomplishment, yet if I were guiding a friend on their first multi-day hike I would strongly suggest the four-day option: Luxmore, Iris Burn, Moturau, then Rainbow Reach. That way the demanding ridge and descent day stands alone, and the following day is a gentler forest and lakeshore walk into Moturau with time to swim and nap before an easy half day out.
As for which section hurt the most, the answer is clear: the long descent from Hanging Valley down to the Iris Burn flats. The alpine ridge is where my lungs worked hardest, but it felt energizing. The descent was where my joints complained. Trekking poles, good boots or trail shoes with solid cushioning, and realistic expectations about how slow downhill can be with a pack make a significant difference. Several people I met underestimated that part of the track because DOC’s time estimate is similar to day one, and they arrived at Iris Burn far more spent than they expected.
My preferred hut surprised me. Before the walk I expected Luxmore, with its panoramic views, to be the highlight. In reality, Moturau would be my first pick for a return visit. Its lakeside beach, sheltered position and more intimate feel combined the best aspects of the Kepler: water, forest, and the satisfaction of distance already walked. If I walked the loop again in four days, I would plan it specifically to give myself a full afternoon and evening at Moturau rather than simply passing through.
The Kepler as a First Great Walk: Fitness, Weather and Expectations
Walking the Kepler made clear why many New Zealanders recommend it as a second or third Great Walk rather than a first. The track surface is excellent by international standards, but the combination of sustained climbing on day one, exposure and length on the alpine day, and long descents and distances on the final days demands more from your body than, say, the Abel Tasman Coast Track. At the same time, the loop format, proximity to Te Anau, and predictable hut infrastructure make it far more approachable than something like a remote backcountry circuit where you carry all your own shelter and cooking gas.
If you are considering the Kepler as your first Great Walk, I would think in terms of both fitness and comfort with exposure. In the month before my trip, I walked several 15 to 20 kilometer day hikes with 600 to 800 meters of elevation gain and carried a 10-kilogram training pack. On the track that translated to feeling strong on day one’s climb and managing, rather than suffering through, the ridge day. I would want to be confident I could comfortably complete a 20-kilometer, 6-hour day with hills before suggesting the Kepler to someone as their very first multi-day outing. If your baseline is mostly flat city walking, give yourself a training window rather than jumping straight in.
Weather-wise, the Kepler rewards flexibility. Fiordland is one of the wettest regions in the world, and even in a “good” week you can experience rapid shifts from sun to cloud to rain and back again. For my ridge day I delayed my start by 24 hours to match a clear forecast and was rewarded with full views and almost no wind. Had I stuck rigidly to the earlier date, I would have spent hours inside a grey soup and wondered what the fuss was about. If you have a week in Te Anau, consider planning your Kepler dates late enough in your stay that you can slide them forward or back a day or two to catch the calmest spell.
Finally, expectations matter. The Kepler is not a remote wilderness track in the sense of rarely seeing other people. In season, the huts are full most nights, you are rarely more than 30 minutes from another party on the main section, and the track is highly engineered. What makes it special is not isolation but the way it strings together such different landscapes in a short loop: lakefront forest, limestone bluffs, wide open alpine ridge, deep valley basin, wetland boardwalk, and river terrace. Walking it all in sequence feels like stitching together a complete Fiordland story in three or four days.
FAQ
Q1: Is the Kepler Track suitable as a first Great Walk for a beginner?
For someone who hikes regularly on hills and can comfortably cover 15 to 20 kilometers in a day, the Kepler can work as a first Great Walk, especially if you take four days and keep your pack light. If you are new to hiking and mostly walk flat urban paths, I would start with an easier Great Walk such as sections of the Abel Tasman Coast Track and build up to the Kepler after some training.
Q2: How many days are best for the Kepler, three or four?
Three days gives a strong sense of achievement but compresses the lakeshore and river sections into a long final push. Four days, staying at Luxmore, Iris Burn and Moturau huts, allows more time to enjoy each landscape, shortens the daily distances, and leaves you fresher at the end. After doing it in three, I would choose four days next time, especially if hiking with less experienced friends.
Q3: What fitness level should I have before attempting the track?
You will enjoy the Kepler most if you can already walk 6 hours in a day on hilly terrain with a 10-kilogram pack and recover well enough to repeat that effort the next day. Practical preparation might include weekend hikes with 600 to 800 meters of elevation gain and regular stair or hill training in the month or two beforehand.
Q4: How heavy should my pack be for a hut-based Kepler hike?
For a three or four-day hut-only trip, many experienced trampers aim for a total pack weight of about 8 to 12 kilograms including water. With gas cookers provided in huts in season and no need for a tent, you can keep gear minimal: one good rain jacket, a warm layer, hut clothes, basic toiletries, a compact first aid kit, and simple food. Anything beyond that should earn its place, because every extra kilogram is noticeable on the long climbs and descents.
Q5: Are sandflies really that bad on the Kepler Track?
Sandflies are a significant nuisance at lower-elevation sites, especially around Iris Burn and Moturau. On my trip they were worst in the late afternoon and around dusk in grassy or swampy areas. Long sleeves, long trousers, a head net or a hat, and a proven insect repellent made a big difference. Up on the exposed ridge near Luxmore they were almost absent, which felt like a bonus reward for the climb.
Q6: What is the hut experience like during the Great Walk season?
During the Great Walk season, Kepler huts have bunk beds with mattresses, gas cookers, basic kitchen benches, toilets, cold running water and a resident hut warden. They feel busy but sociable, with people cooking, drying gear and sharing route stories each evening. You need to bring your own sleeping bag, food, utensils and any personal medications. There is no power for personal devices, so do not rely on charging phones or cameras.
Q7: How does the exposed alpine ridge compare with the forest and lakeside sections?
The alpine ridge between Luxmore Hut and the descent toward Iris Burn is open, exposed and visually spectacular, with big views in clear weather and full exposure to wind, rain and cloud in bad conditions. In contrast, the lakefront forest near Lake Te Anau and the later wetlands and river terraces feel enclosed, green and more sheltered. Walking the full loop means experiencing all of these in sequence, which is one of the Kepler’s biggest rewards.
Q8: What happens if the weather is bad on the ridge day?
In poor weather the ridge can be cold, windy and sometimes lacking in views, but it generally remains straightforward to follow in season because of the well-marked track and shelters. If forecasts predict severe wind or heavy rain, DOC staff may advise delaying your departure or adjusting plans. Many walkers, including some I met, completed the ridge safely in grey conditions but felt they had missed the scenery, so if you can, build some flexibility into your schedule to wait for a clearer window.
Q9: Can I shorten the first or last day with transport options?
Yes. Many people take a water taxi from Te Anau across Lake Te Anau to Brod Bay to skip the first flat lakeshore section and start closer to the main climb. At the other end, it is common to finish at Rainbow Reach and use a shuttle back to Te Anau rather than walking the extra forest distance to the Kepler car park. Both options reduce total walking time and are worth considering if you are short on time or energy.
Q10: Would you personally hike the Kepler Track again?
Yes, but with a few changes. I would plan four days instead of three to enjoy a full afternoon at Moturau Hut, cut my pack weight by at least 2 kilograms, and again time my start so the ridge day aligned with the best forecast. With those adjustments and a maintained fitness base that includes regular hill walking, I would be eager to repeat the loop and experience the same landscapes in different light and weather.