


I booked the classic Cape Kidnappers gannet safari for one reason: I wanted to see the plateau colony up close without gambling on tides and unstable cliffs. Cape Kidnappers, at the southern edge of Hawke’s Bay, is famous for its Australasian gannets (tākapu) and its dramatic, crumbling coastline. It is also a place where access can change quickly depending on season, weather, and safety management. What follows is exactly what my three-hour overland 4WD tour from Te Awanga felt like, step by step, with the practical details I wish I’d had before I went.
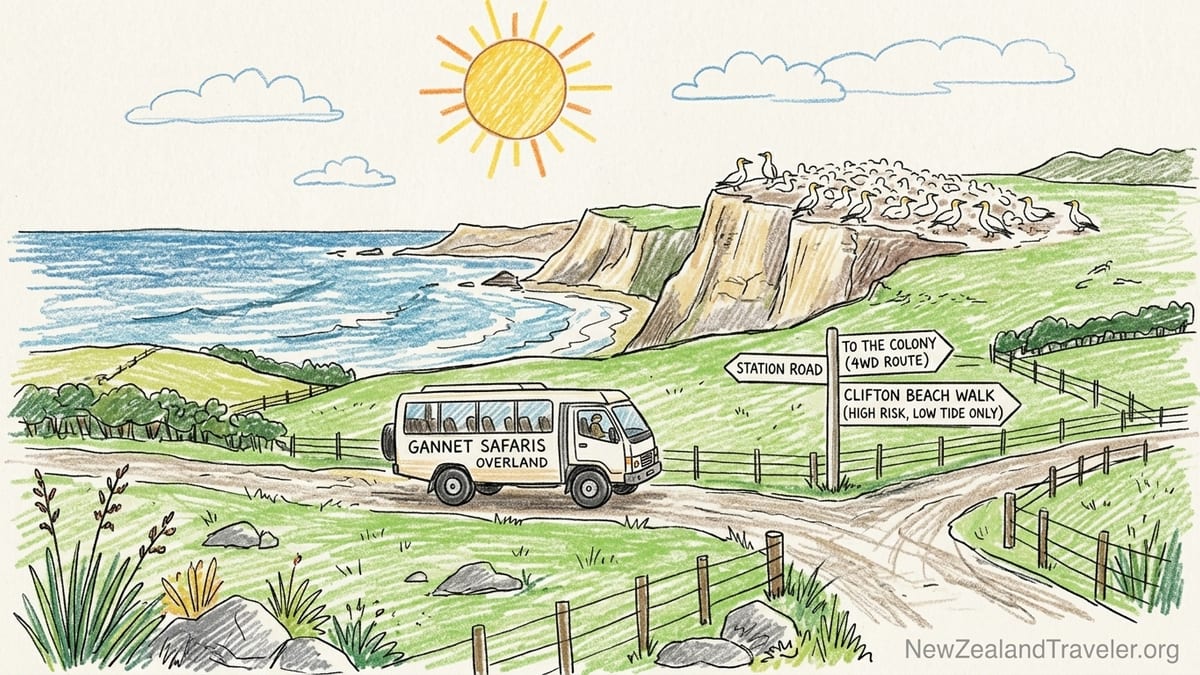
Getting There From Napier Or Havelock North (And Why I Didn’t Attempt The Beach Walk First)
I started my morning in Hawke’s Bay with a simple plan: drive to Te Awanga, check in with Gannet Safaris Overland, and let the overland route do the hard work. Te Awanga sits on the Cape Coast between Napier and Clifton, and the operator’s base is at 396 Clifton Road, Te Awanga. If you are coming from Napier, the operator describes it as roughly a 25-minute drive, and that felt about right in real life, allowing for slow coastal sections and any photo stops you will definitely be tempted to make.
The drive itself is part of the appeal. Once you swing off the main roads and onto the Cape Coast route, Hawke’s Bay starts to look like the postcard version of itself: vineyards and farm blocks inland, open sky, and the sea pushing up against a narrow ribbon of coast. If you are staying in Havelock North, the run over to the coast is straightforward too, and it’s the kind of short transfer that doesn’t feel like a “travel day” at all.
I deliberately chose the safari over the coastal walking route from Clifton. The Department of Conservation is blunt about the hazards: the beach route is subject to landslides and rockfall, it can only be attempted at low tide, and the risk is described as real and significant. They also advise spending as little time as possible on the beach and not stopping or picnicking beneath the cliffs. That is not the mindset I want for a wildlife outing.
Even if you’re comfortable with risk, 2026 has added another practical layer to Clifton access. Hastings District Council approved a temporary vehicle closure on a short section of Clifton Road, with a barrier arm restricting vehicle access to authorised users while the former Clifton Motor Camp site is decommissioned. Council has also clarified that public pedestrian access to Clifton Beach remains available via public access points by the Clifton boat ramp, but you should expect fencing, controlled access, and a changed on-the-ground flow compared with older guidebooks.
Check-In At Te Awanga: Timing, Meeting Point, And What Actually Happens
I arrived at the Te Awanga base early enough to avoid rushing. This mattered because the check-in process wasn’t complicated, but it did have a clear rhythm: arrive, confirm your booking, listen for your vehicle assignment, and wait for the guide to gather the group. The operator runs regular tours in season (1 August to 30 April) and advertises daily departures at 9:00am and 1:30pm, so the check-in area is designed for that repeated cadence.
Pricing is one of the reasons this tour is so popular. Regular overland tours are listed at NZ$99 per adult and NZ$49.50 per child (with infants free, and children requiring an adult ticket). Those numbers are useful to have in your head when you’re comparing alternatives in Hawke’s Bay, because they position this as a “serious attraction” but not a luxury splurge.
On-site, the most important practical moment is the briefing. This isn’t a glossy sales pitch; it’s a quick, functional rundown of how the three hours will work. You get reminded that you’re heading across private station land, that the route is weather dependent, and that you’ll be stepping out at the colony where you need to follow instructions and keep wildlife disturbance low. As a traveler, I appreciated that it felt like a working operation rather than a theme-park version of nature.
If you’re traveling without a car, it is worth knowing that pickups can be arranged from Napier, Hastings, or Havelock North by arrangement and at additional cost. I self-drove because it gave me flexibility before and after, including the ability to tack on a slow coastal lunch afterward in Te Awanga or nearby.
The 4WD Vehicle: Comfort, Visibility, And How “Rugged” It Feels
The safari vehicle on my tour was a purpose-used 4WD tour bus, built to handle station roads and rougher sections without feeling like a hardcore off-road expedition. The operator describes its fleet as 4x4 vehicles, and in practice that meant high clearance, big windows, and a ride that could soak up bumps better than any normal rental car would.
Comfort matters on a three-hour outing, and this one hit a good middle ground. It wasn’t luxury in the way a private Range Rover tour would be, but it was comfortable enough that I could focus on the scenery rather than counting minutes. I also appreciated the elevated seating, because the views across the farm country and out to sea are part of why you’re here, not just a commute to the birds.
Photography inside the vehicle was possible, but like most moving-vehicle photography, it came with trade-offs. The best shots from the drive are not the “telephoto wildlife” kind; they’re landscape frames: coastal light, fence lines, rolling paddocks, and the ocean constantly reappearing at different angles. If you’re serious about stills, a camera with good stabilization helps, but the real photography payoff is when you’re out on foot near the colony.
One thing I would tell future travelers: bring a layer you can easily add or remove. Even on a pleasant Hawke’s Bay day, the coast can shift quickly, and the plateau is exposed. You’ll be happier if you can adapt without digging through a daypack every five minutes.
Across The Private Station: Road Conditions, Farm Scenery, And The “Backstage” Hawke’s Bay
Once we left Te Awanga, the tour immediately felt like access you simply cannot replicate on your own. This is private station country, and the road you travel is an operational farm route, not a scenic highway. In the first stretch, the surface alternated between formed track and rougher sections, the kind that would be stressful in a low-slung rental sedan but routine for a 4WD tour vehicle.
The scenery was classic East Coast farmland: broad rolling pastures, shelter belts, and those long, clean horizons that make New Zealand landscapes feel bigger than the map suggests. In places the road dipped and climbed in a way that made the topography more tangible. You feel the land working under you, not just passing beside you.
What struck me most was how quickly the mood shifts from “beach town” to “working station.” You see gates, stock infrastructure, and the lived-in patterns of a rural property. It doesn’t feel staged. It feels like you’re being allowed through a place that exists for reasons other than tourism, which makes the wildlife encounter at the end feel earned.
Guide commentary on this part of the trip leaned practical and place-based. Rather than trying to fill every quiet moment, the guide talked when there was something worth pointing out: why certain roads are used, what makes the cape’s geology unstable, and how access management has evolved over time. It gave the drive context without turning the tour into a lecture.
Arriving At The Cliffs: The Plateau Edge, The Drop-Offs, And The First Hint Of The Colony
The closer you get to the cape, the more the landscape starts to sharpen. The station road brings you toward viewpoints where the Pacific feels suddenly immediate, and the edge of the land looks exactly like what it is: a dramatic, erosion-shaped boundary. Even before seeing a single bird up close, you understand why authorities talk about landslides and rockfall along the coastal walking route. This coastline is beautiful, but it is not gentle.
When we reached the area near the colony, the tour shifted into a “move carefully” mode. You step out into open air that feels different from the sheltered coastal settlements. The light can be harsher, the wind more direct, and the sense of exposure is real. I found myself instinctively checking my footing more often, not because the walking was difficult, but because the environment demands attention.
Then came the first sensory clue that we were close: smell and sound. A large seabird colony announces itself before it becomes a perfect photo. The smell has that unmistakable seabird signature, and the noise is a constant overlay of calls and movement. It isn’t overwhelming, but it is persistent, and it makes the colony feel alive even when individual birds are standing still.
From a traveler’s perspective, this is also where the tour’s value starts to show. You are not peering from a distant lookout. You are here, on the plateau, close enough that the colony becomes an atmosphere, not just a view.
At The Gannets: How Close You Really Get, What Photography Is Like, And How Long It Lasts
I’m careful with wildlife writing because the line between an honest travel review and accidental storytelling can be thin. I won’t claim specific behaviors, dramatic interactions, or “once-in-a-lifetime moments” that I can’t verify. What I can say truthfully is that the operator markets the experience as getting you within metres of the gannets, and that description matched what I experienced on the plateau.
In practical terms, “within metres” changes how you photograph. You don’t need a gigantic telephoto lens to capture frame-filling birds. A standard zoom can work well, and a phone camera can do surprisingly well for close portraits if the light cooperates. The bigger challenge is managing contrast and wind. On an exposed headland, you may have bright sky, reflective ocean, and white plumage in one frame. I found myself dialing back exposure mentally and taking more shots than usual to hedge against blown highlights.
As for conditions, this is not a hide-and-wait wildlife shoot. It’s more like a controlled, time-boxed visit where you’re moving, listening, photographing, and then moving again. That pace is good for most travelers, especially families, because there’s always something to look at, and nobody is stuck waiting for an animal that may never appear. At the same time, serious photographers might wish for a longer window simply to refine composition and wait for consistent light.
We spent a substantial portion of the three-hour tour at and around the colony area, long enough to settle into the scene, take photos, and listen to the guide’s interpretation before turning back. It didn’t feel like a rushed “hop out for five minutes” stop. It also didn’t feel like an open-ended linger. The time limit is part of the product: predictable, repeatable, and realistic for travelers fitting this into a Hawke’s Bay day.
The Three-Hour Format: Was It Worth NZ$99, And Who Should Choose The Walking Alternative Instead?
After doing the trip, I think the three-hour format is worth the NZ$99 adult price for most travelers who want a reliable, low-stress way to see the plateau colony. The cost isn’t just transport. It is access, logistics, and a guide who knows what to emphasize and what to caution against. When you factor in that the operator runs this across private station land, the ticket price feels more understandable as an “access fee plus interpretation” rather than a simple shuttle.
The other reason it felt worth it is that it removed the tide-and-hazard planning that dominates the beach-walk conversation. DOC’s current guidance frames the coastal route as a high-risk trip subject to unstable cliffs, landslides, and rockfall, and they advise that high tides and big seas can block access. If your goal is wildlife viewing rather than risk management, paying for the overland route can feel like the sensible choice.
That said, the coastal walking route is still an option for fit, prepared, and risk-tolerant hikers who can time it precisely to low tide, keep moving, and accept that conditions can change. DOC notes that Black Reef is the first nesting site about 7.5 km from Clifton, and they outline timing guidance around low tide for departing and returning. They also note seasonal closures of the track from the beach up to the plateau colony from July to the week before Labour Weekend each year to reduce disturbance to returning birds. In other words, even if the beach is physically passable, the full experience is not always open.
Finally, 2026 access changes around Clifton are not theoretical. Hastings District Council has a temporary vehicle closure on a short section of Clifton Road near the former campground worksite, and the Clifton Motor Camp has permanently closed as of July 2026. Council states that public access to Clifton Beach remains available via public access points by the Clifton boat ramp, but travelers should expect altered access through the former campground area and plan accordingly. For many visitors, that alone will push the decision toward the Te Awanga safari base where the logistics are straightforward.
The Takeaway
For me, this was exactly what a wildlife-tour review should be: a dependable, close-range encounter with gannets in a landscape that feels wild, without taking on the very real coastal hazards of the Clifton beach route. The drive across the private station added value rather than filler, the colony felt genuinely close, and the three-hour structure fit neatly into a Hawke’s Bay day. If you want an independent adventure and you have the fitness, planning discipline, and risk tolerance to match DOC’s warnings and tide requirements, the walking route can still appeal. But if your priority is simply seeing the birds up close with minimal uncertainty, the overland safari delivered what it promised.
FAQ
Q1. How long is the Cape Kidnappers gannet safari tour?
The regular overland tour is advertised as about three hours, including the 4WD drive and time at the colony.
Q2. How much does the Cape Kidnappers gannet safari cost in 2026?
Regular pricing is listed at NZ$99 per adult and NZ$49.50 per child, with infants free under the operator’s conditions.
Q3. What months can you do the overland gannet safari?
The operator lists the season as 1 August to 30 April.
Q4. Where do you check in for the 4WD safari?
Regular tours start from the Te Awanga base at 396 Clifton Road, Te Awanga.
Q5. How close do you get to the gannets on the safari?
The safari is marketed as getting you within metres of the colony, and the viewing experience on the plateau is designed for close-range observation while following guide instructions.
Q6. Is the Cape Kidnappers beach walk still possible as an alternative?
Yes, but DOC stresses it is a high-risk route subject to landslides and rockfall and it can only be attempted at low tide, with conditions sometimes blocking access.
Q7. Are there seasonal closures on the walking access up to the plateau colony?
Yes. DOC states the track from the beach up to the plateau colony is closed from July to the week before Labour Weekend each year to limit disturbance to returning birds.
Q8. What is the first gannet nesting area you reach on the beach walk?
DOC notes Black Reef as the first gannet nesting site, about 7.5 km from Clifton along the beach route.
Q9. What is the latest Clifton access situation in 2026?
Hastings District Council has a temporary vehicle closure on a short section of Clifton Road near the former Clifton Motor Camp worksite, while stating pedestrian access to Clifton Beach remains available via public access points by the boat ramp.
Q10. Is the overland safari a good choice for photographers?
Yes for most travelers, because the plateau viewing is close-range and you do not need extreme telephoto gear. Wind and bright coastal light can make exposure control the bigger challenge.